

MCP Hub
The MCP Hub is the integration layer that connects oHallo to your business systems. It is where you add, manage, and monitor the connections that allow AI agents to look up orders, check inventory, create quotes, and perform other tasks in your external tools.
What is MCP?
Section titled “What is MCP?”MCP (Model Context Protocol) is a standard way for AI to communicate with external tools and data sources. Think of it as a universal adapter — instead of building a custom integration for every system, MCP provides a single, consistent way for oHallo’s agents to interact with any connected service.
Each MCP connection provides a set of tools that agents can call. For example, a Shopify connection might provide tools like “search_orders”, “get_product”, and “get_customer”. When an agent needs order information, it calls the appropriate tool, and the MCP connection handles the communication with Shopify.
Types of MCP connections
Section titled “Types of MCP connections”oHallo supports four types of MCP connections, each suited to different integration needs:
| Type | What it is | Setup |
|---|---|---|
| System | Built-in connections provided by oHallo for core capabilities like knowledge base queries, policy lookups, calendar operations, and CRM access. | Always active. Cannot be removed. |
| Marketplace | Pre-built integrations for popular business tools like Shopify, Salesforce, HubSpot, and Xero. | Guided setup with OAuth or API key from the Marketplace. |
| Custom | Connections to MCP servers you build and host yourself. | Manual configuration with endpoint URL, auth type, and credentials. |
| Paid add-ons | Specialised capabilities operated by oHallo (logistics tracking, address validation, company registry enrichment, live currency conversion). | Subscribe to activate. No server URL or credentials needed. |
System connections appear automatically. Marketplace and paid connections are managed from the Marketplace. Custom connections are configured in the MCP Hub below.
The MCP Hub page
Section titled “The MCP Hub page”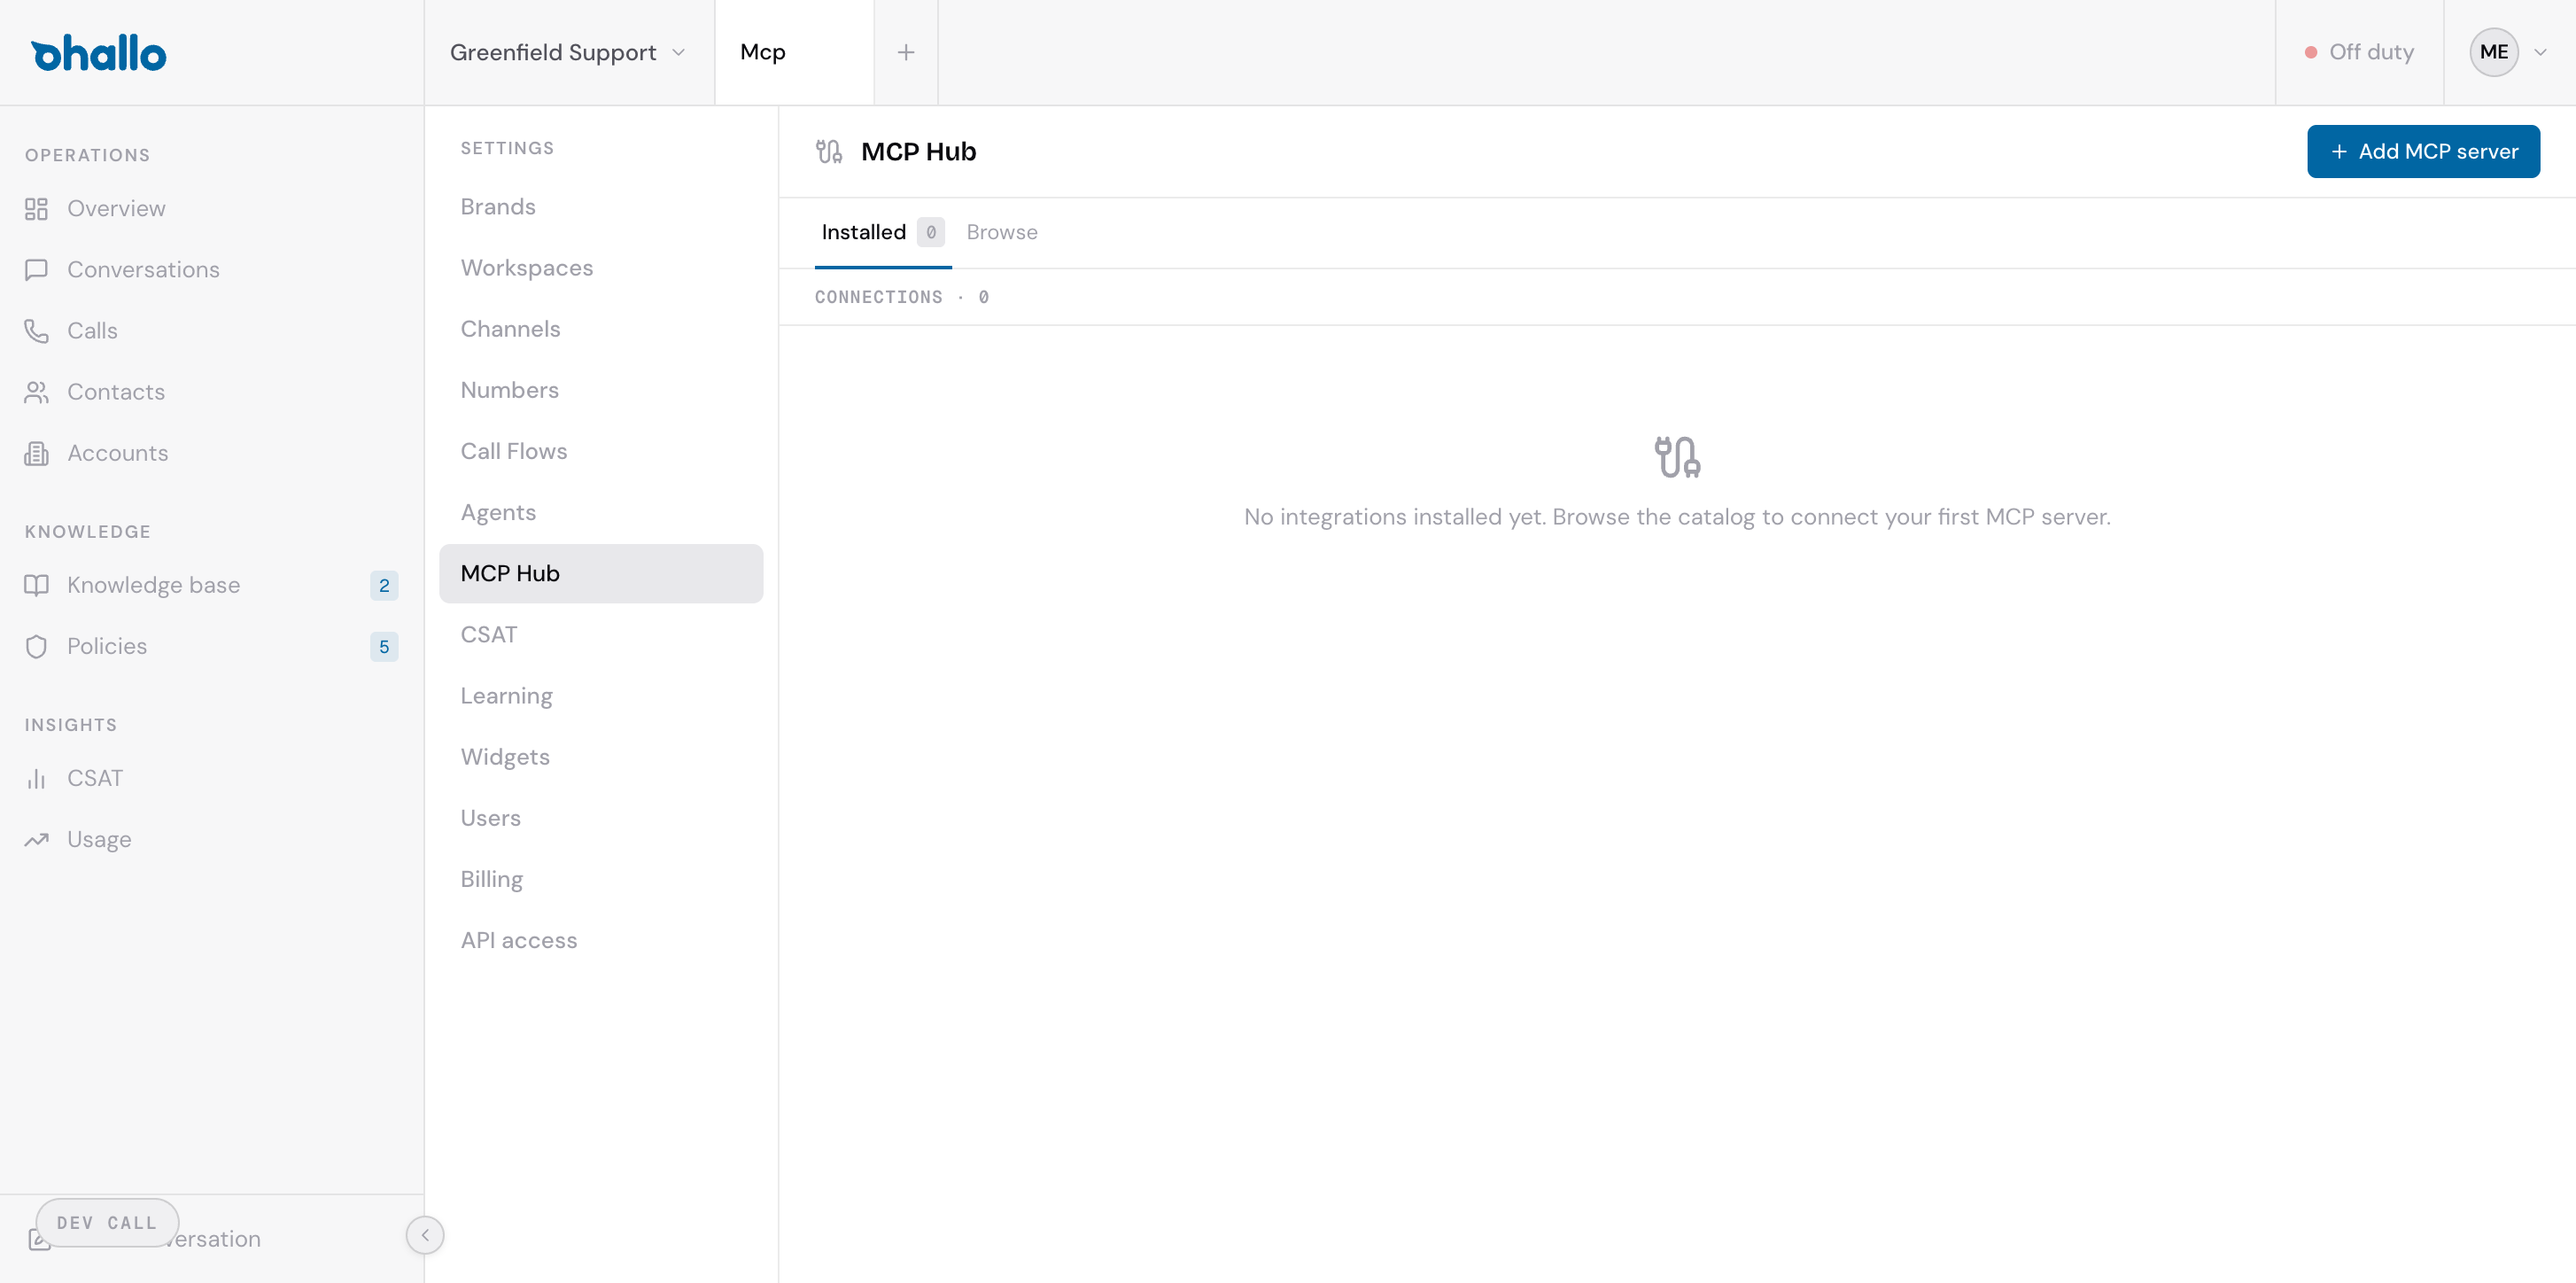
Go to Settings — MCP Hub to manage your integrations. The page has two tabs:
- Installed — your active connections, showing each connection’s name and status
- Browse — a catalog of available integrations you can add
Browsing the catalog
Section titled “Browsing the catalog”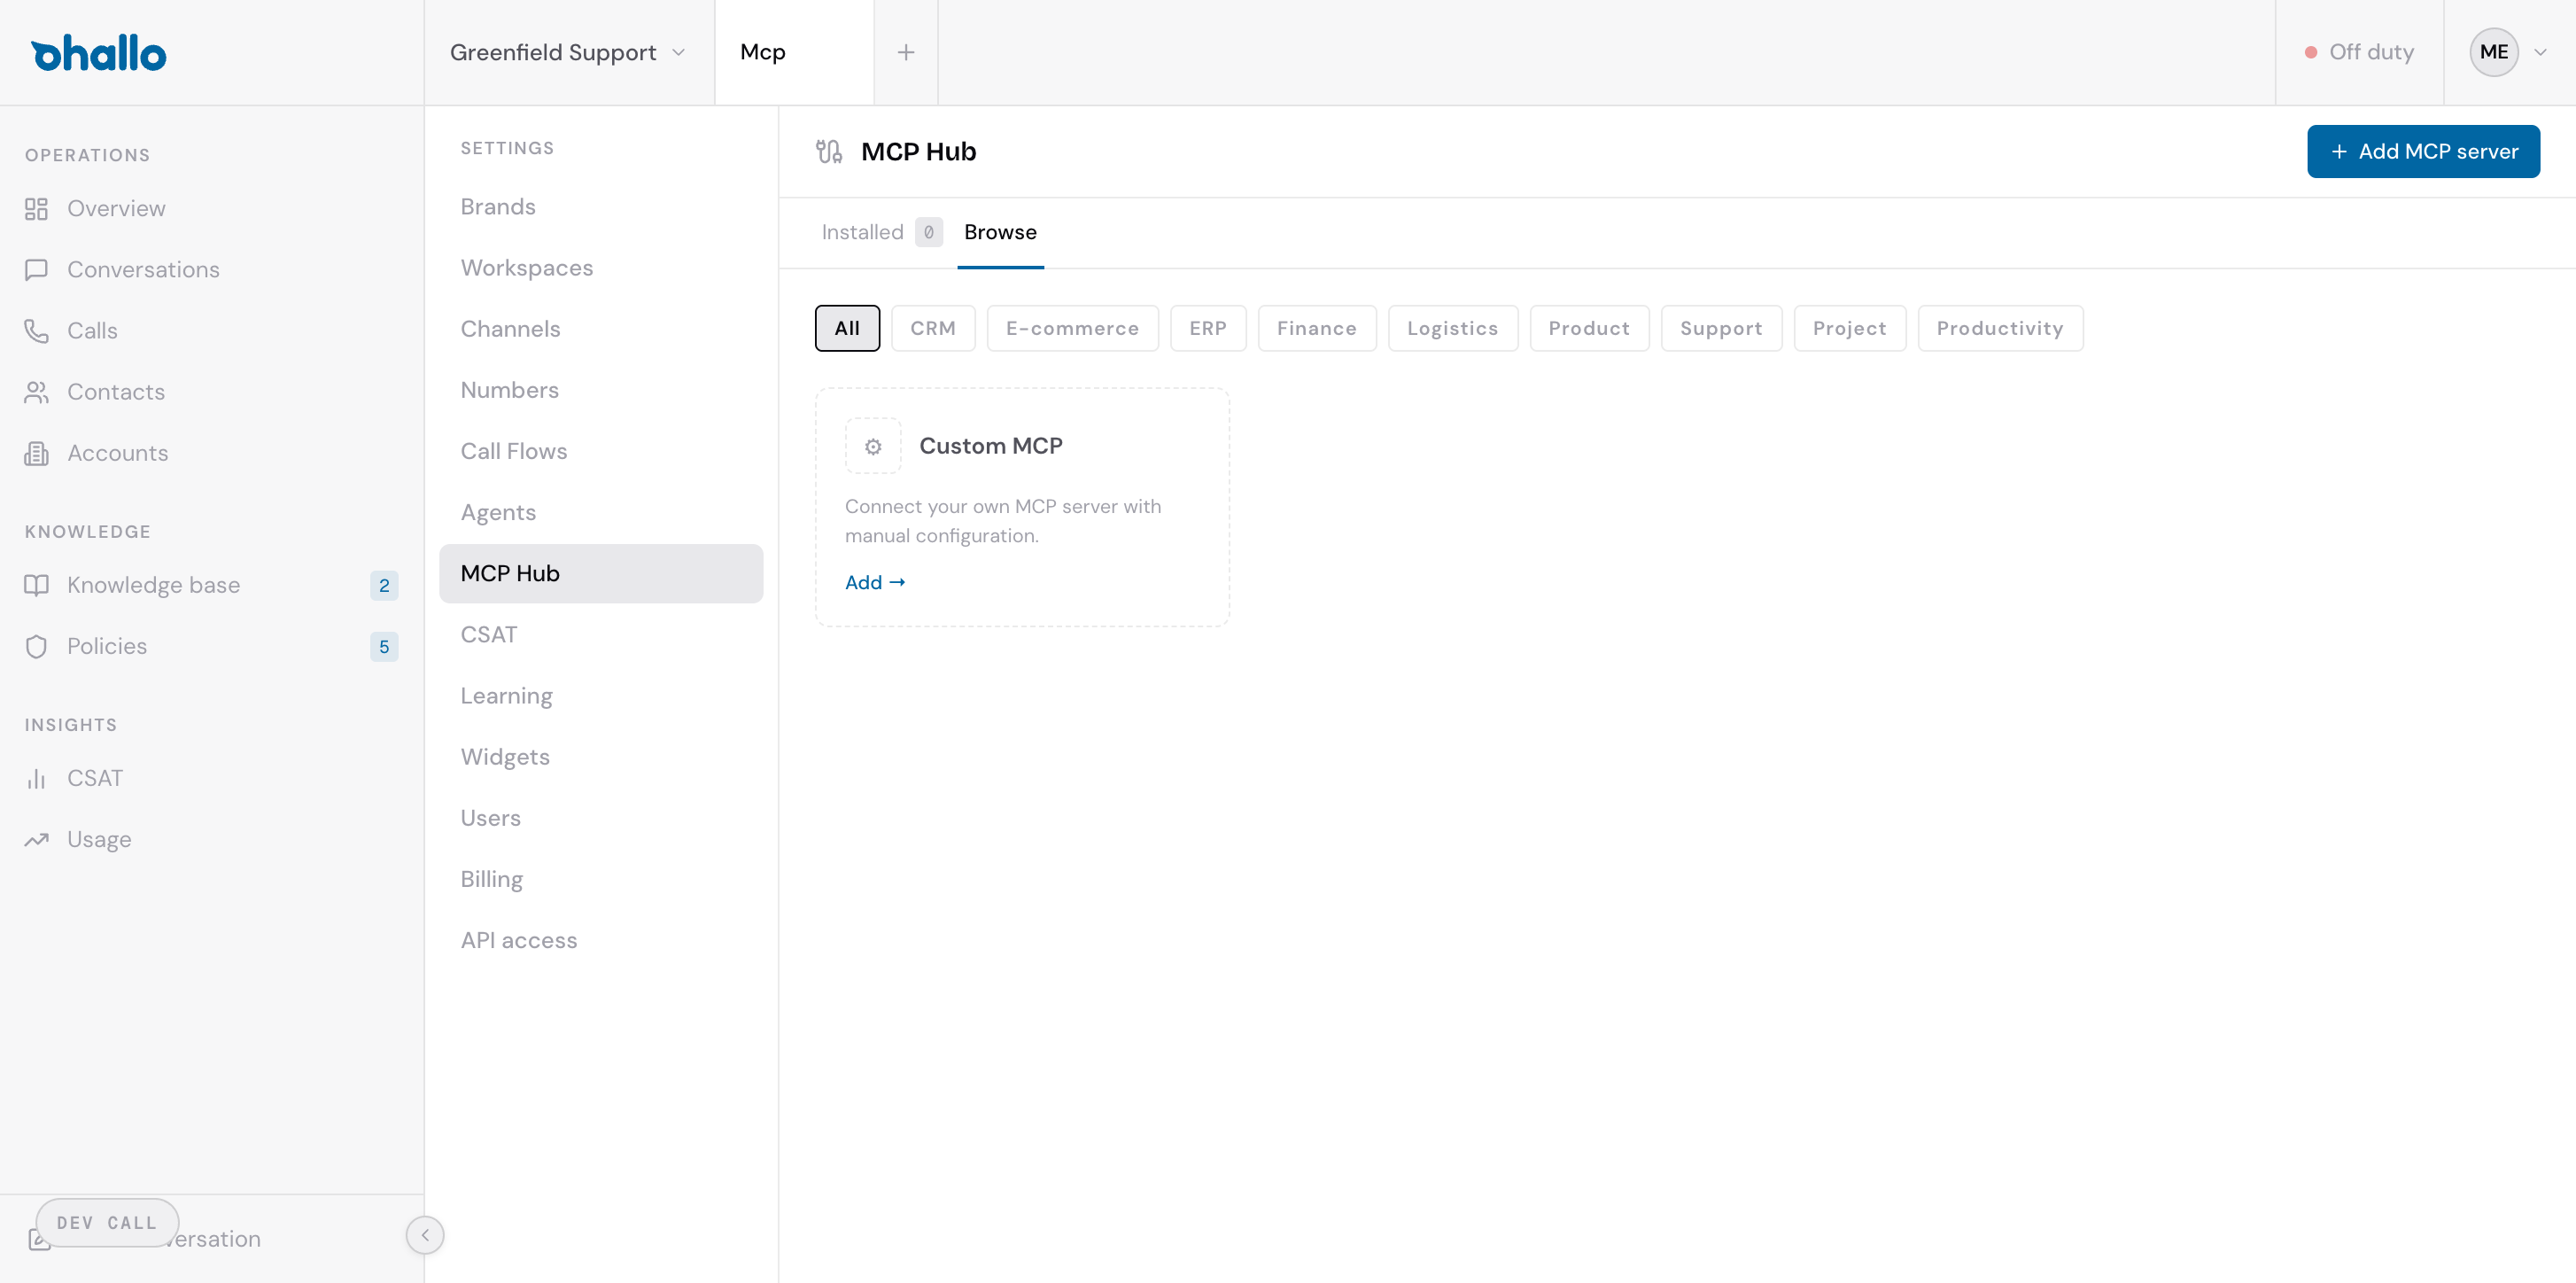
The Browse tab shows available connectors organised by category. Use the filter buttons at the top to narrow by type:
- CRM — HubSpot, Salesforce, and other customer relationship tools
- E-commerce — Shopify, WooCommerce, Magento
- ERP — SAP, Oracle, and enterprise resource planning systems
- Finance — Xero, QuickBooks, Stripe
- Logistics — shipping and warehouse management systems
- Product — product information management systems
- Support — ticketing and helpdesk systems
- Project — project management tools
- Productivity — general-purpose workplace tools
The Custom MCP option at the top left lets you connect any system that exposes an MCP endpoint, even if it does not appear in the catalog.
Connecting an MCP server step by step
Section titled “Connecting an MCP server step by step”Step 1 — Choose a connector
Section titled “Step 1 — Choose a connector”Click the + Add MCP server button in the top-right corner. You will see the connector picker:
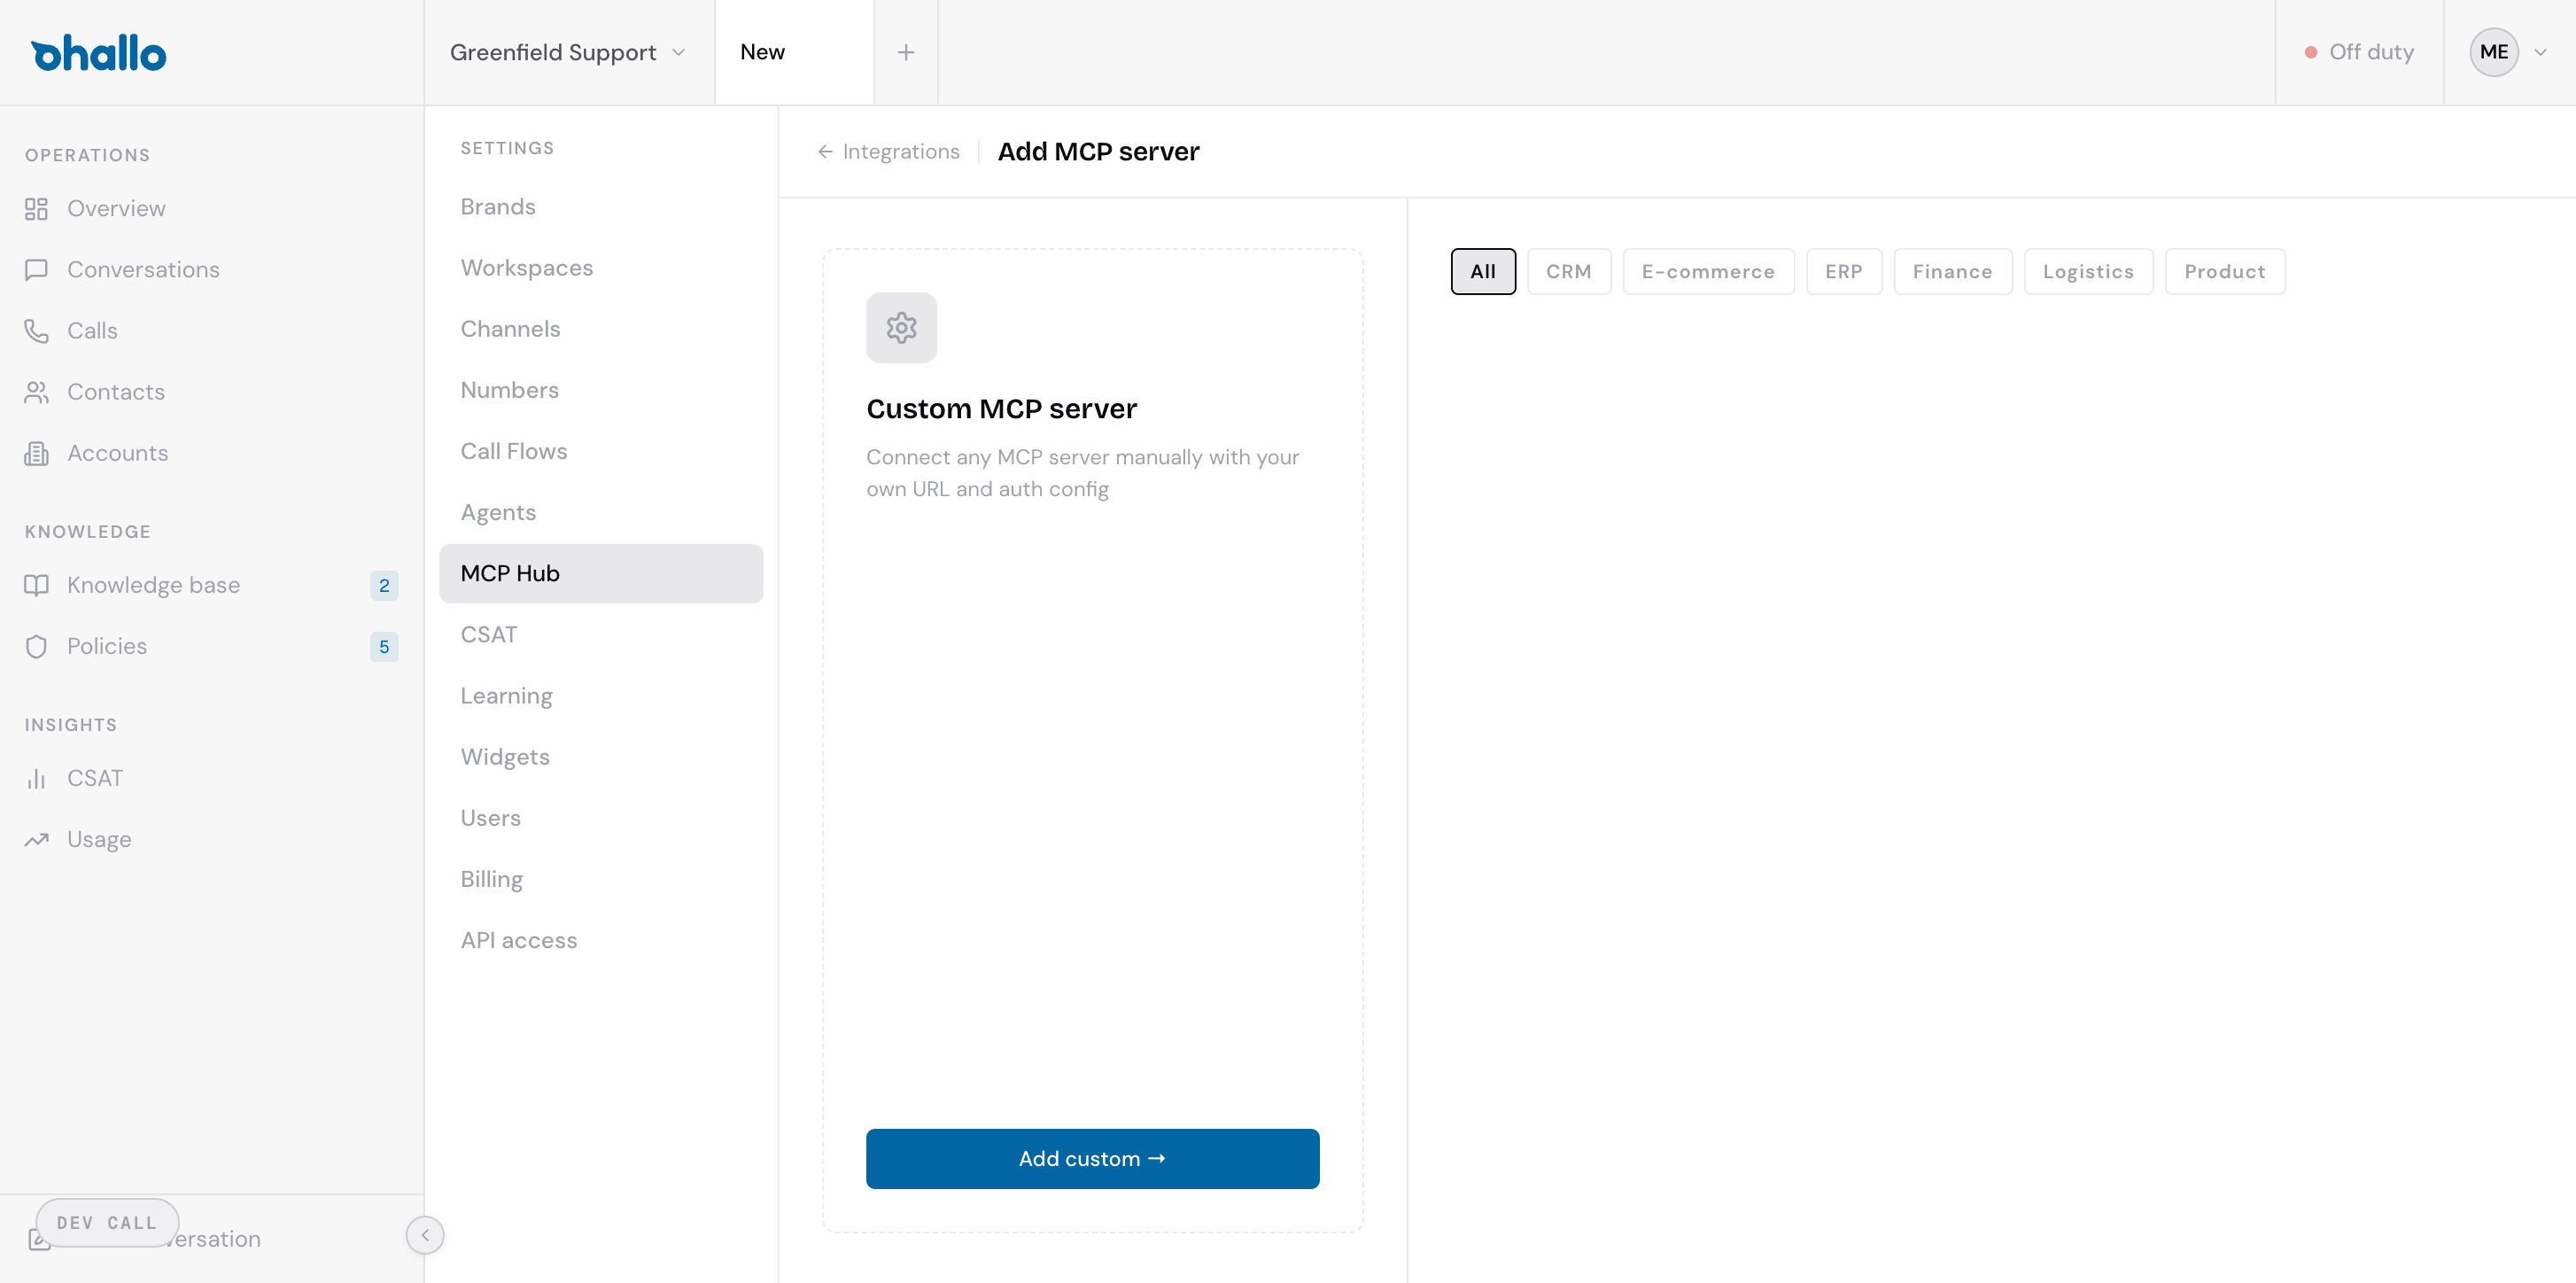
You have two options:
- Start from a catalog connector — click a pre-built connector card (e.g. Shopify, HubSpot). The connector will pre-fill some configuration for you.
- Custom MCP — click Add custom to connect any MCP server manually.
Step 2 — Configure the connection
Section titled “Step 2 — Configure the connection”After selecting a connector, the configuration form appears:
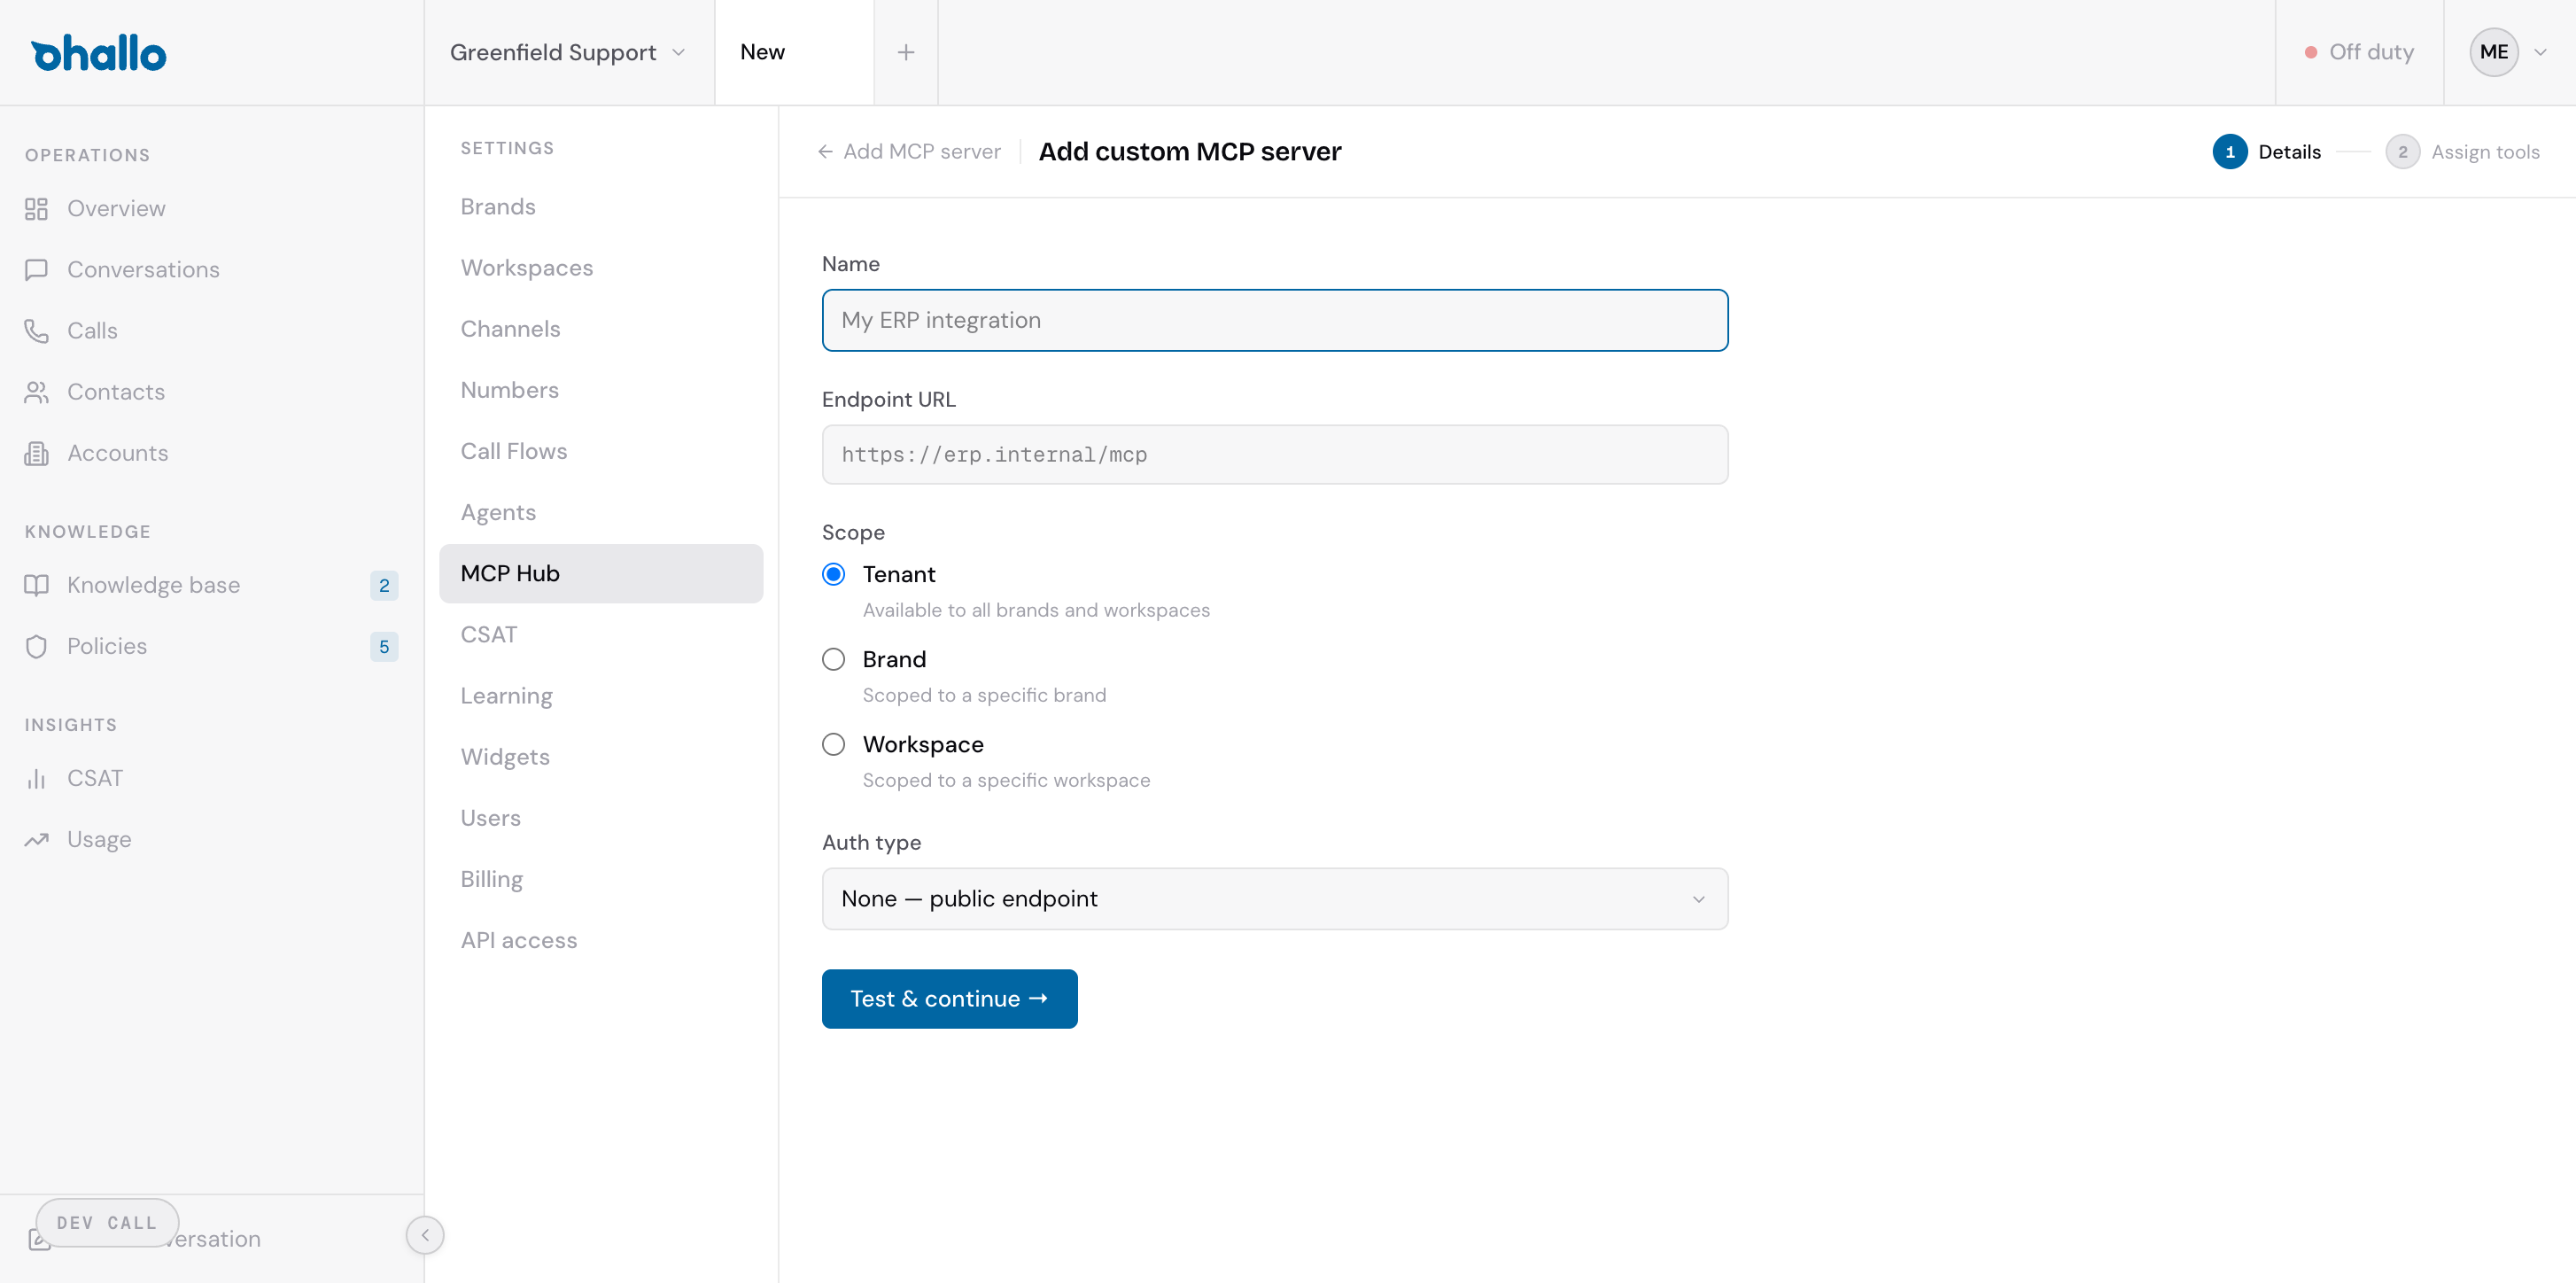
Fill in the following fields:
| Field | Description |
|---|---|
| Name | A label to identify this connection (e.g. “Production Shopify”, “Warehouse API”). Choose something your team will recognise. |
| Endpoint URL | The address of the MCP server. Your IT team or the service provider will supply this. It typically looks like https://your-system.example.com/mcp. |
| Scope | Controls who can use this connection. Choose one of three levels (see “Connection scope” below). |
| Auth type | How oHallo authenticates with the server. Options include: None (public endpoint, no credentials needed), Bearer token (a single API key or token), OAuth 2.0 (client ID and secret for token-based auth), or Basic (username and password). |
If you selected Bearer token or OAuth 2.0, additional fields will appear to enter the credentials.
Step 3 — Test and continue
Section titled “Step 3 — Test and continue”Click Test & continue. oHallo will attempt to connect to the server, verify the credentials, and retrieve the list of available tools. If the test fails, check the endpoint URL and credentials.
Step 4 — Assign tools
Section titled “Step 4 — Assign tools”After a successful connection test, you will see the list of tools the MCP server provides. You can review the tool names and descriptions to confirm the connection is correct. Click Save to finish.
The connection now appears on the Installed tab and its tools are available for agents to use.
Connection status
Section titled “Connection status”Each connection shows one of three statuses:
| Status | Meaning |
|---|---|
| Active | The connection is working normally. Agents can call its tools. |
| Degraded | The connection is experiencing partial failures. Some tool calls may fail or be slow. Check the underlying system for issues. |
| Unreachable | The connection is offline. Agents cannot call any of its tools. Verify the server URL and credentials. |
Connection scope
Section titled “Connection scope”When adding a connection, you choose its scope — this controls which parts of your organisation can use it:
| Scope | Who can use it | When to choose |
|---|---|---|
| Organisation | All brands and workspaces | The system is shared across your entire organisation (e.g. a single ERP). |
| Brand | All workspaces within a specific brand | Different brands use different systems (e.g. each brand has its own Shopify store). |
| Workspace | Only a specific workspace | Regional teams use different systems (e.g. EU warehouse vs US warehouse). |
Tools provided by connections
Section titled “Tools provided by connections”Each connection exposes a set of tools that agents can call. You can see the full list of tools for any connection by clicking on it in the Installed tab. Common tool types include:
- Lookup tools — retrieve information (e.g. “get_order”, “search_products”, “get_customer”)
- Action tools — perform operations (e.g. “create_quote”, “update_status”, “send_notification”)
- Search tools — find records by keyword or filter (e.g. “search_orders”, “find_invoices”)
When you create custom agents in Settings — Agents, you select which MCP connections the agent can use and pick which specific tools it can call. This means each agent only has access to the tools it needs.
Managing existing connections
Section titled “Managing existing connections”To view or edit an existing connection, click on it in the Installed tab. From the detail page you can:
- View the list of tools the connection provides
- Check the connection status and last successful call
- Update the endpoint URL or credentials
- Change the scope
- Delete the connection (this will remove it from any agents that use it)