

Managing Conversations
The Conversations page is your inbox. It lists every conversation across all channels in your workspace, and gives you tools to search, filter, and stay on top of your queue.
The conversation list
Section titled “The conversation list”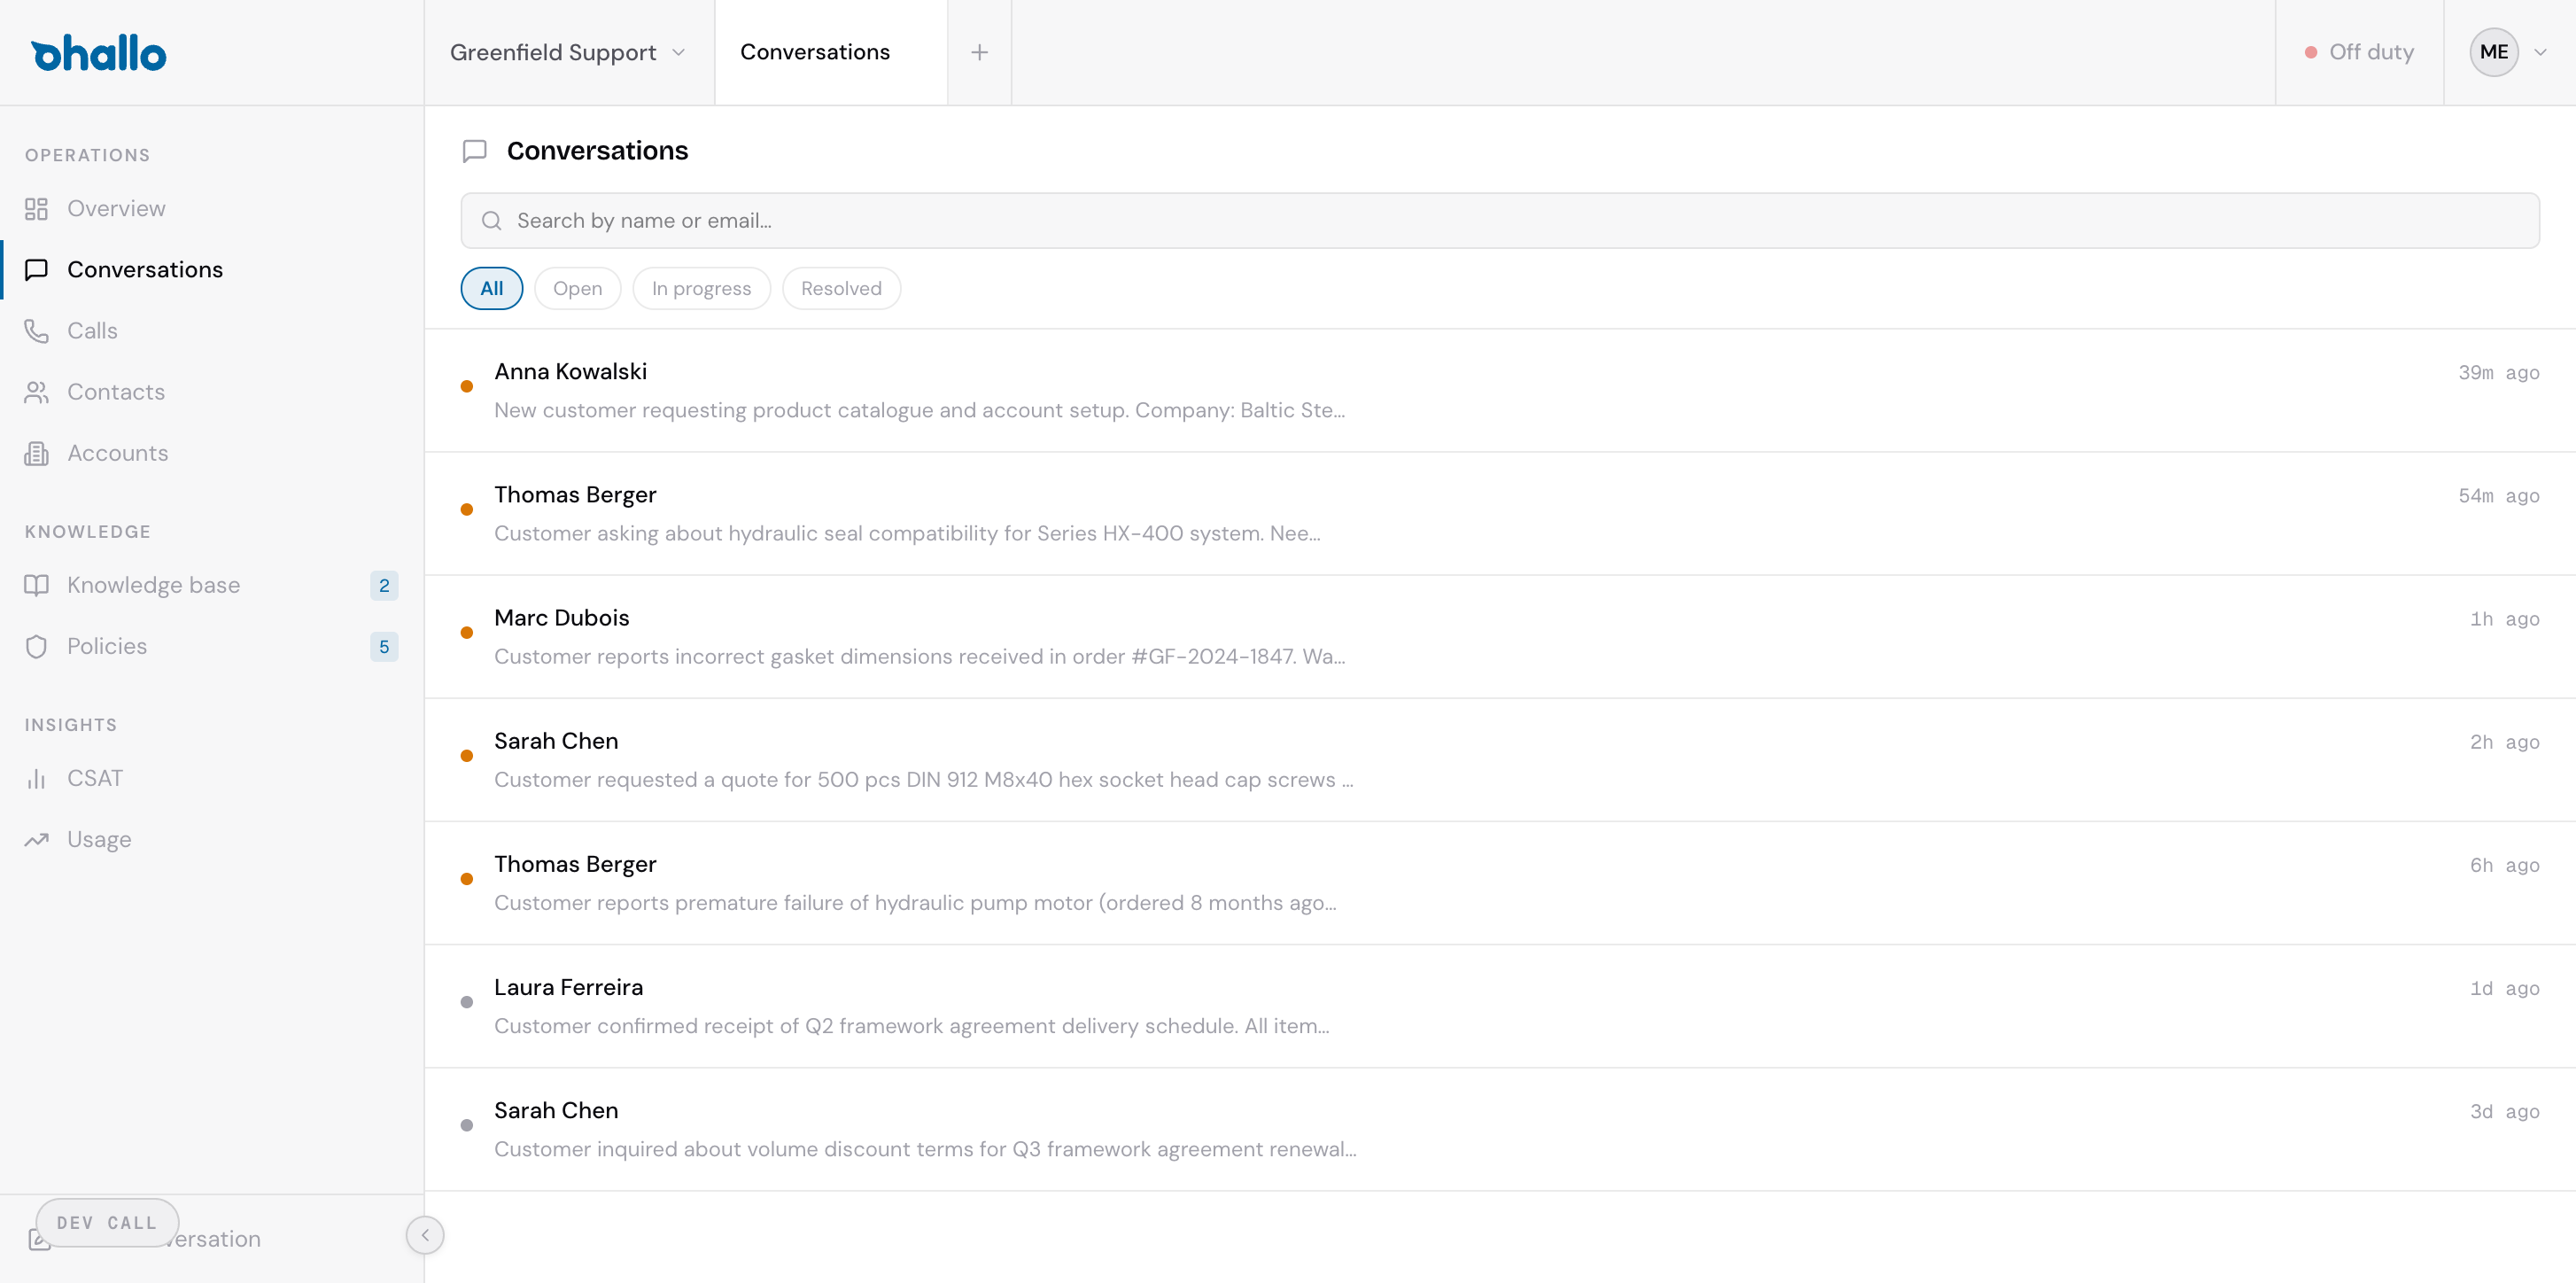
Click Conversations in the sidebar to open the list. Each row in the list represents a single conversation and shows:
- Status indicator — A coloured dot on the left side of the row. An orange dot means the conversation is open and the AI is handling it. A blue dot indicates a conversation that is in progress with a human agent. A grey arrow shows a resolved conversation.
- Contact name — The name of the customer involved in the conversation.
- Summary preview — A brief description of what the conversation is about, so you can scan your inbox without opening every thread.
- Time stamp — How long ago the last activity occurred (for example, “8m ago” or “1h ago”), shown on the right side.
Searching and filtering
Section titled “Searching and filtering”Search bar
Section titled “Search bar”At the top of the conversation list, the search bar lets you find conversations by contact name or email address. Type a name or email and the list filters in real time.
Filter tabs
Section titled “Filter tabs”Below the search bar, you will see filter tabs that let you narrow the list by status:
- All — Shows every conversation regardless of status.
- Open — Conversations the AI is currently handling.
- In progress — Conversations where a human agent has taken over.
- Resolved — Completed conversations.
Click a tab to switch views. The active tab is highlighted so you always know which filter is applied.
Opening a conversation
Section titled “Opening a conversation”Click any row in the list to open that conversation’s detail view. You will see the full message thread, metadata, and action buttons. See Reading a Conversation for details on what you will find there.
Starting a new conversation
Section titled “Starting a new conversation”To compose an outbound message to a customer, click the New conversation button. This opens the compose view where you can select a recipient and draft your message. See Composing Outbound Messages for a full walkthrough.