

Agents
Agents are AI workers that handle specific parts of conversation processing. Some are built into the platform and always active; others are custom agents you create to handle your specific business needs.
The Agents page
Section titled “The Agents page”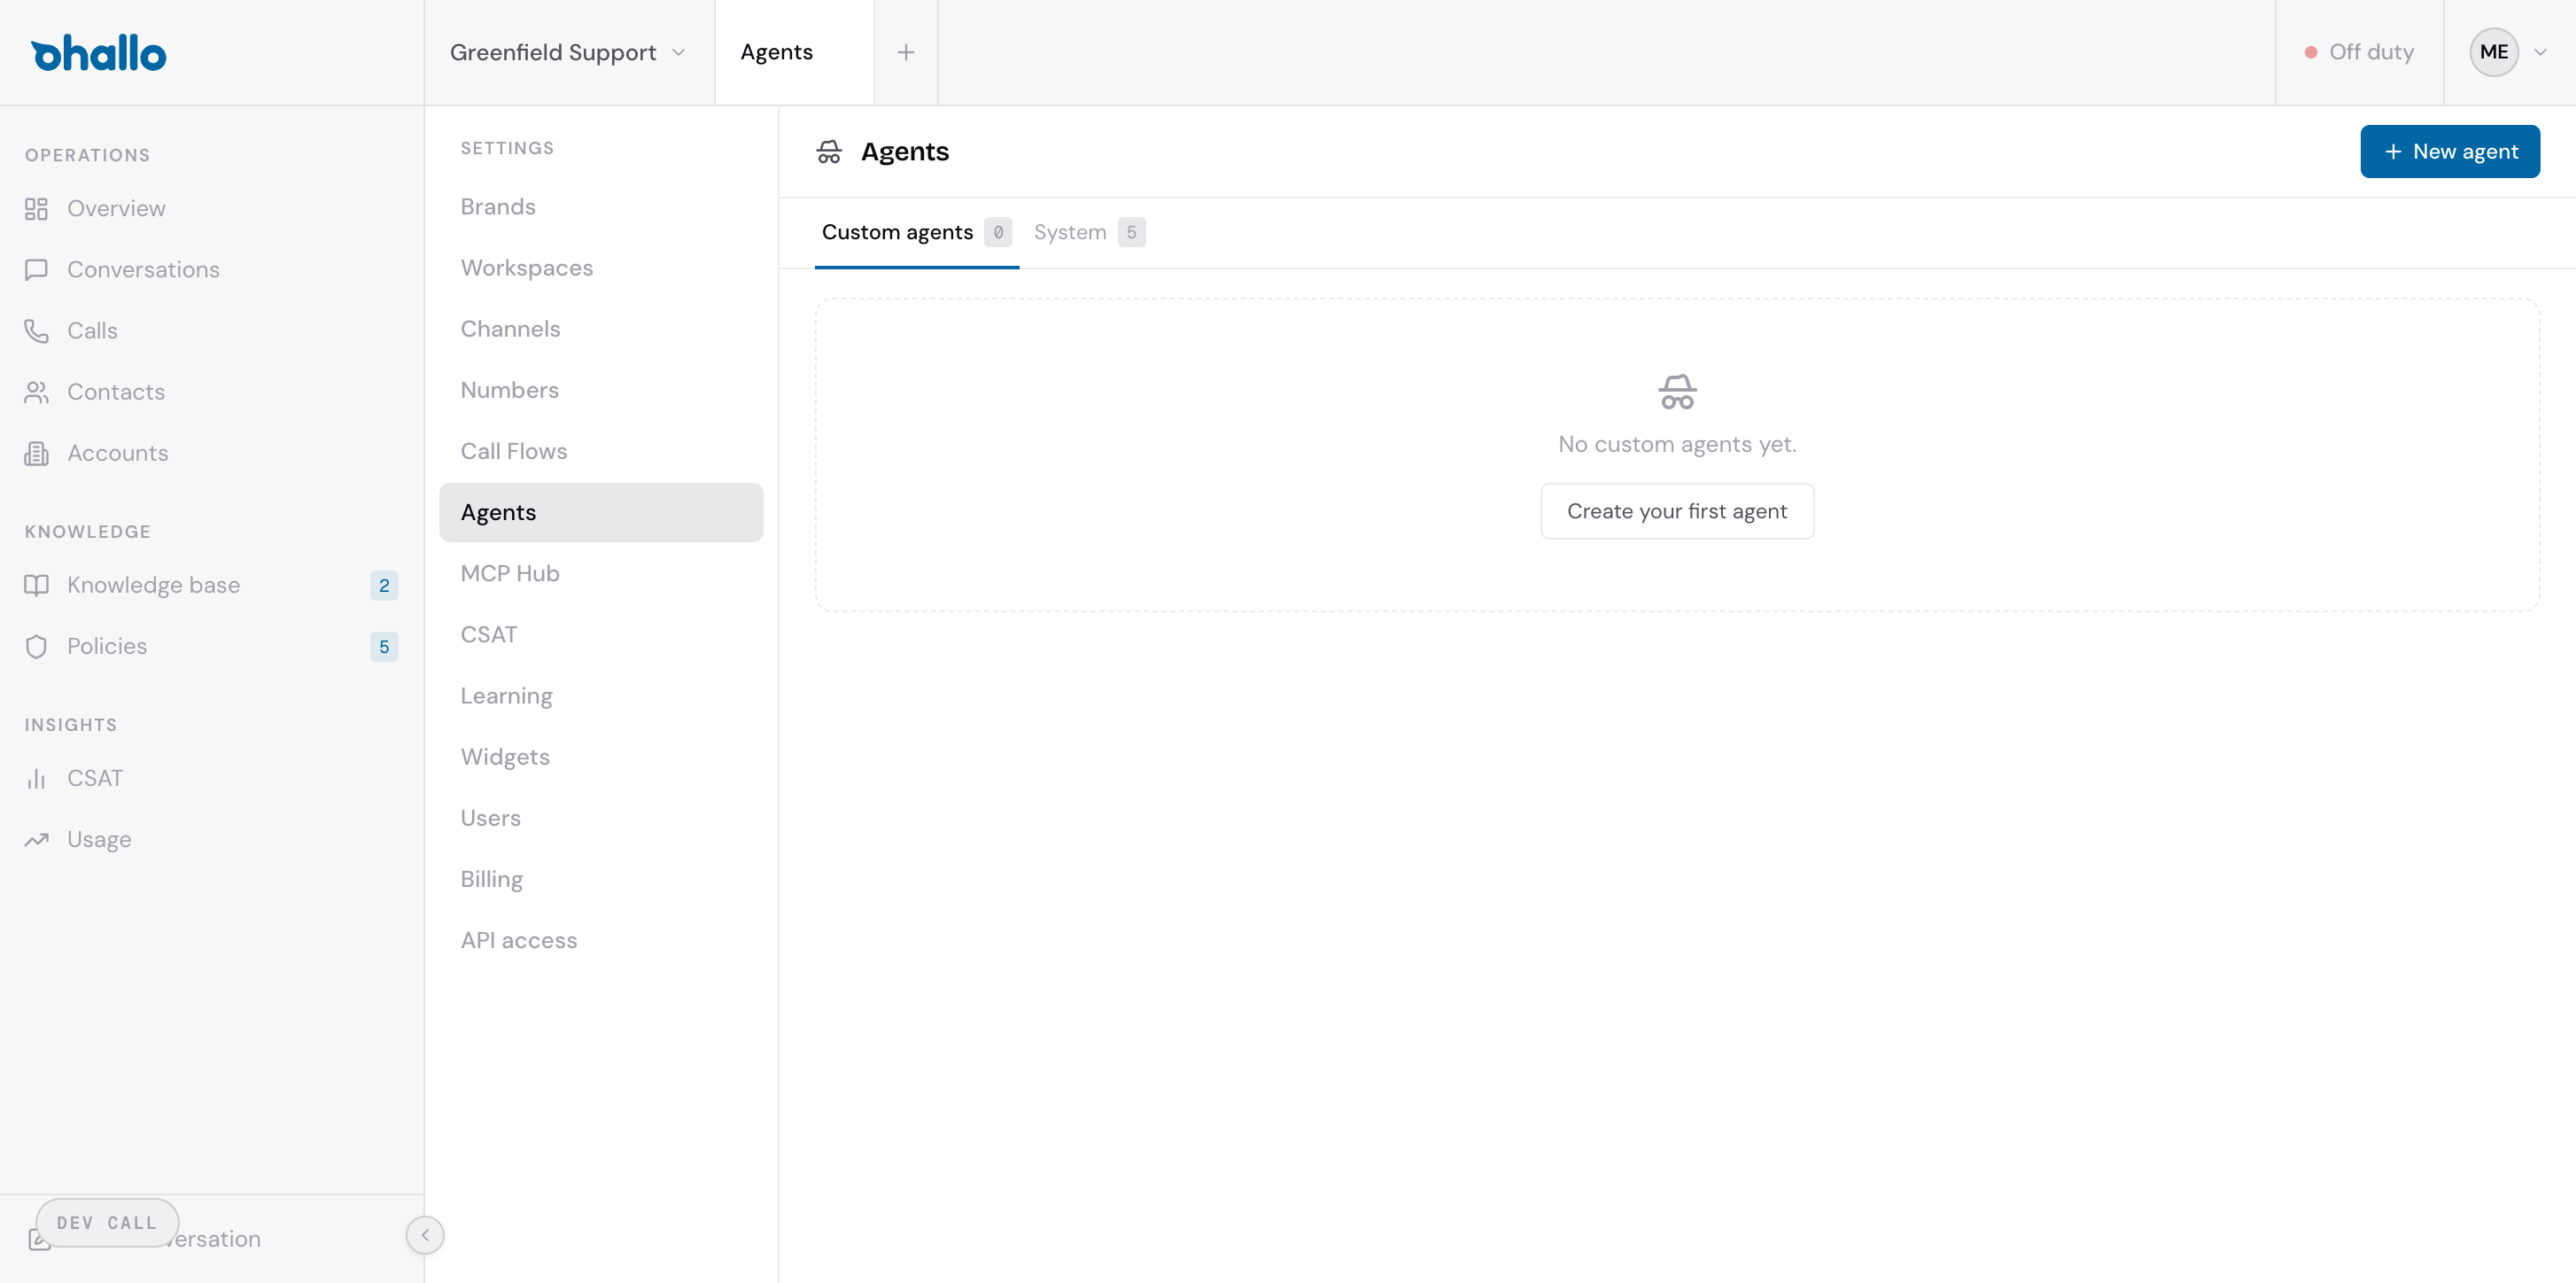
Go to Settings — Agents to manage your agents. The page has two tabs:
- Custom agents — specialist agents you have created for your business
- System — the built-in agents that power the core conversation pipeline
The count next to each tab shows how many agents are in that category.
System agents
Section titled “System agents”oHallo includes four system agents that are always active. These handle the core steps of every conversation:
| Agent | What it does |
|---|---|
| Conversation Orchestrator | Analyses each incoming message, classifies the customer’s intent, and determines which specialist agents to dispatch. Evaluates their results and decides when enough information has been gathered. |
| Message Agent | Drafts the reply to the customer using information gathered by specialist agents, your knowledge base, and your policies. |
| Reply Validation Agent | Checks the drafted reply for factual accuracy and policy compliance before it is sent. |
| Learning Loop Agent | Analyses resolved conversations and proposes improvements to your knowledge base and policies. |
You can view system agents and customise their behaviour by adding guidance hints — short instructions that steer how the agent operates. For example, you might add a hint to the Message Agent like “Always sign off with the sender’s first name” or “Use metric units exclusively.” System agents cannot be deleted.
Custom agents
Section titled “Custom agents”Custom agents are specialist agents you create to handle specific tasks in your business. For example:
- An Order Status Agent that looks up order tracking information
- A Returns Agent that processes return requests and creates RMA numbers
- A Product Enquiry Agent that answers product specification and availability questions
- A Proposal Agent that generates quotes from pricing data
- A Spec Agent that produces technical specification sheets
When a customer message comes in, the Orchestrator decides which custom agents are needed based on their descriptions. Those agents then run, gather information from your business systems via MCP tools, and pass the results to the Message Agent to compose the reply.
Creating a custom agent step by step
Section titled “Creating a custom agent step by step”Step 1 — Choose a starting point
Section titled “Step 1 — Choose a starting point”Click + New agent in the top-right corner. The agent picker appears:
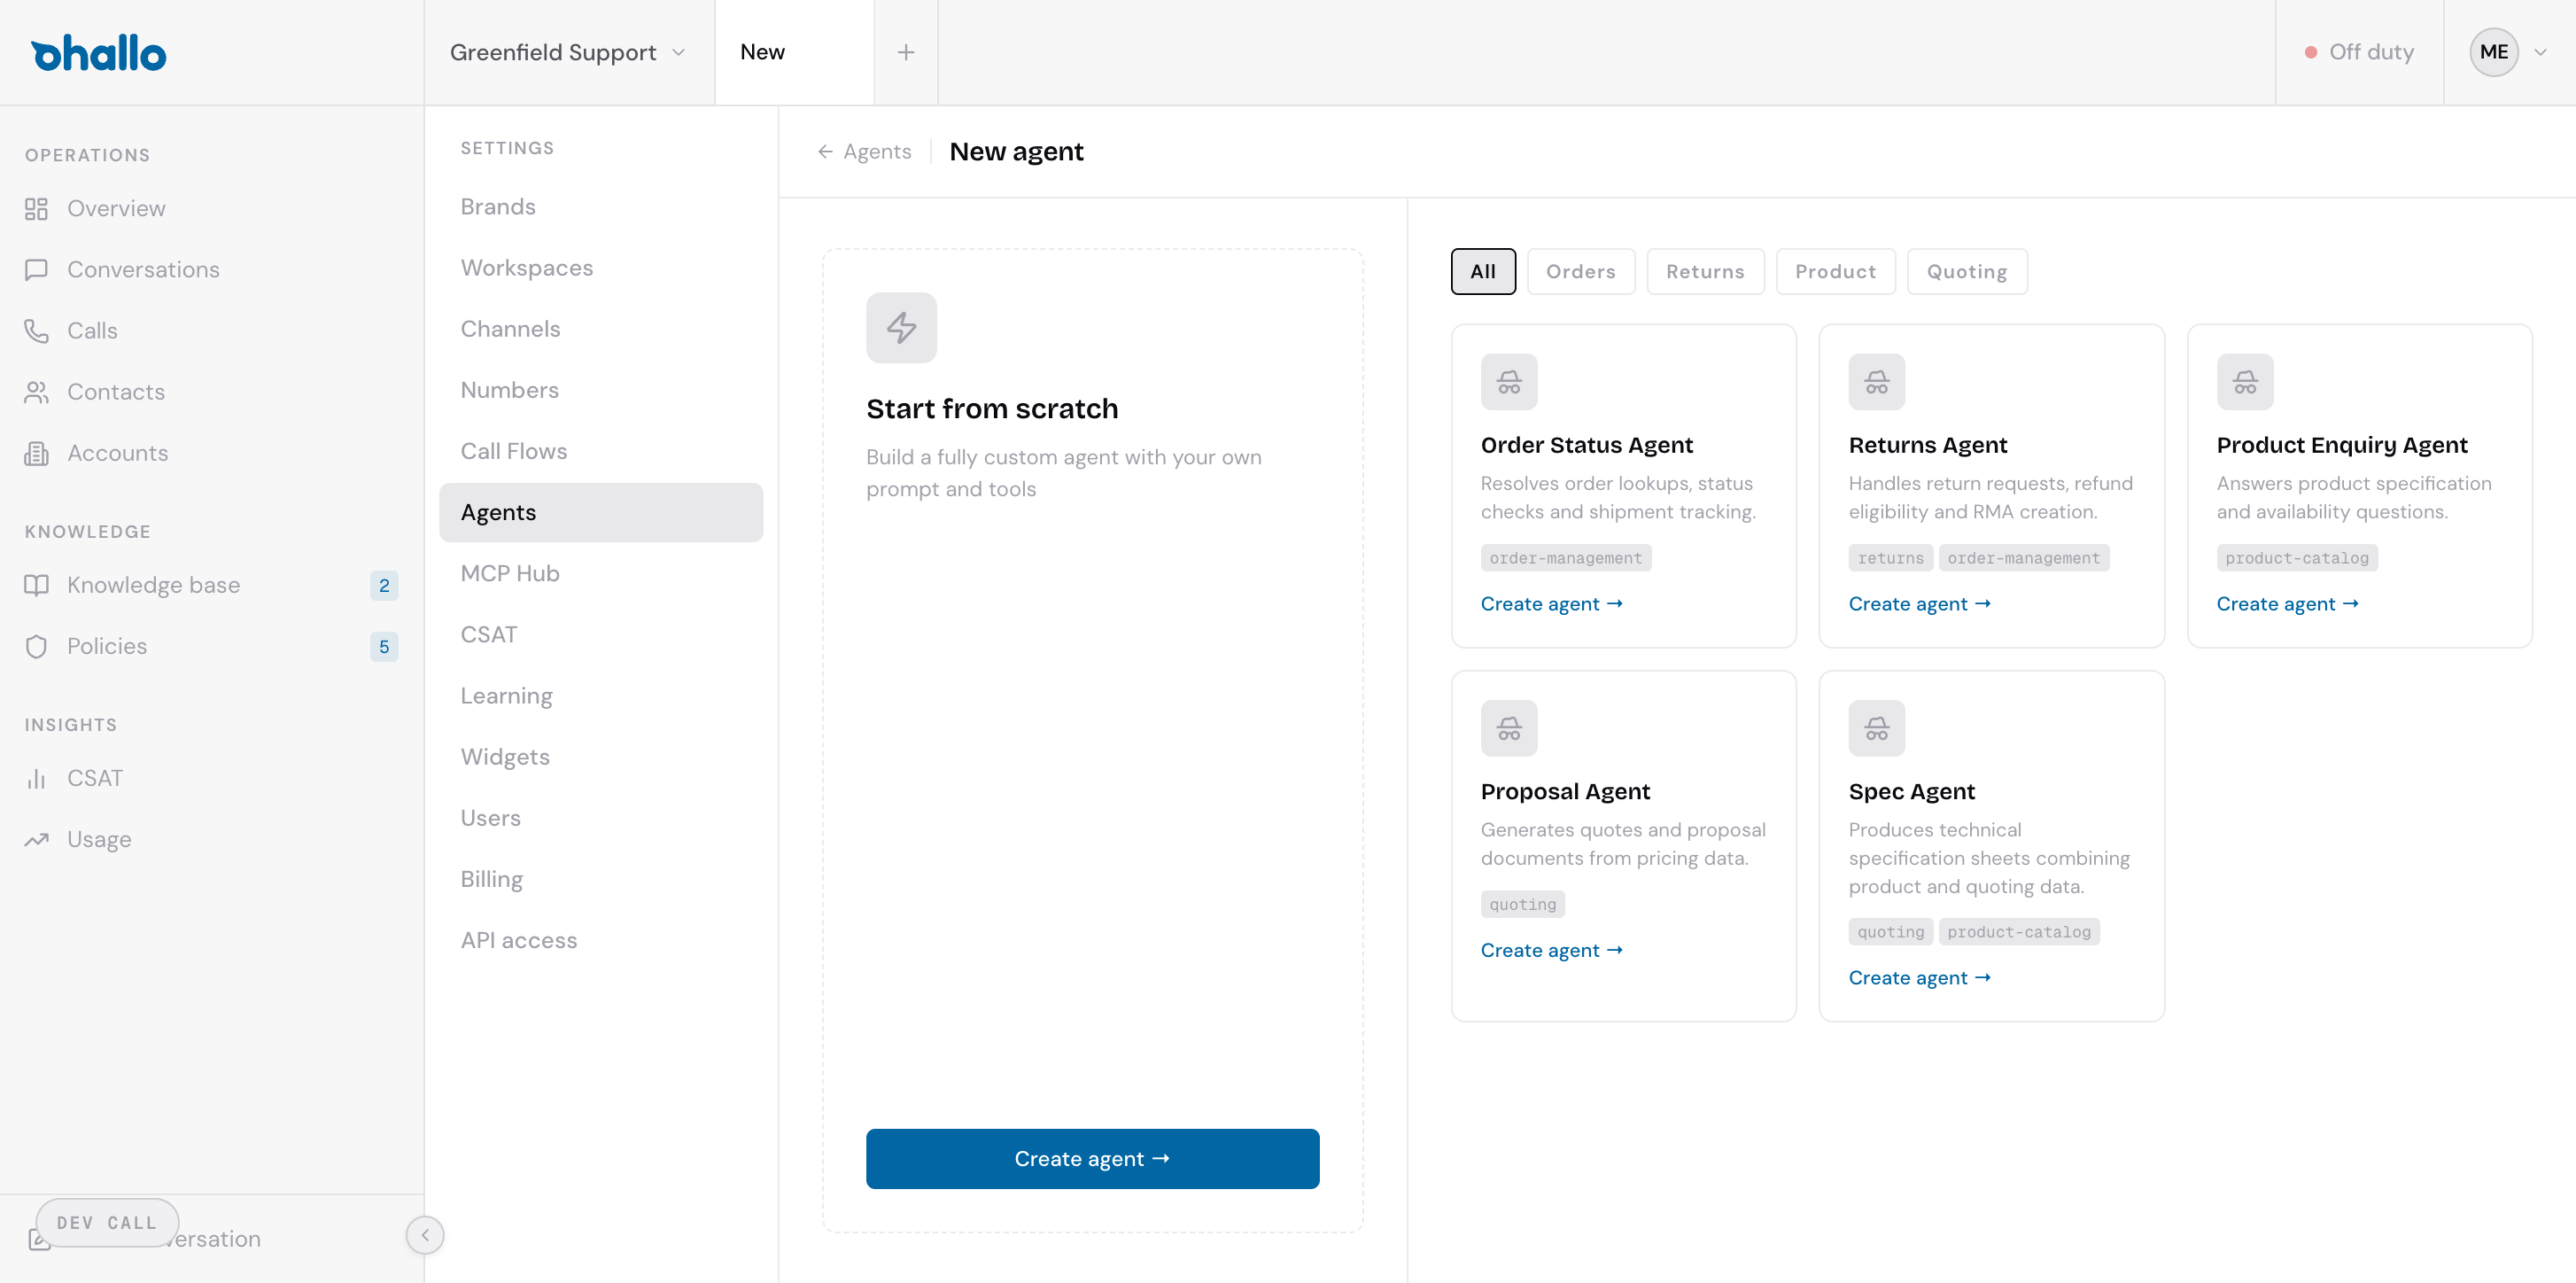
You have two options:
- Start from scratch — build a fully custom agent with your own prompt and tool selection. Click the Create agent button at the bottom left.
- Use a template — pick one of the pre-built templates on the right (e.g. Order Status Agent, Returns Agent, Product Enquiry Agent). Templates come with a pre-written system prompt and suggested MCP tool categories. Click Create agent on the template card to use it.
You can filter templates by category using the buttons at the top (All, Orders, Returns, Product, Quoting).
Step 2 — Configure the agent
Section titled “Step 2 — Configure the agent”After selecting your starting point, the agent configuration form appears:
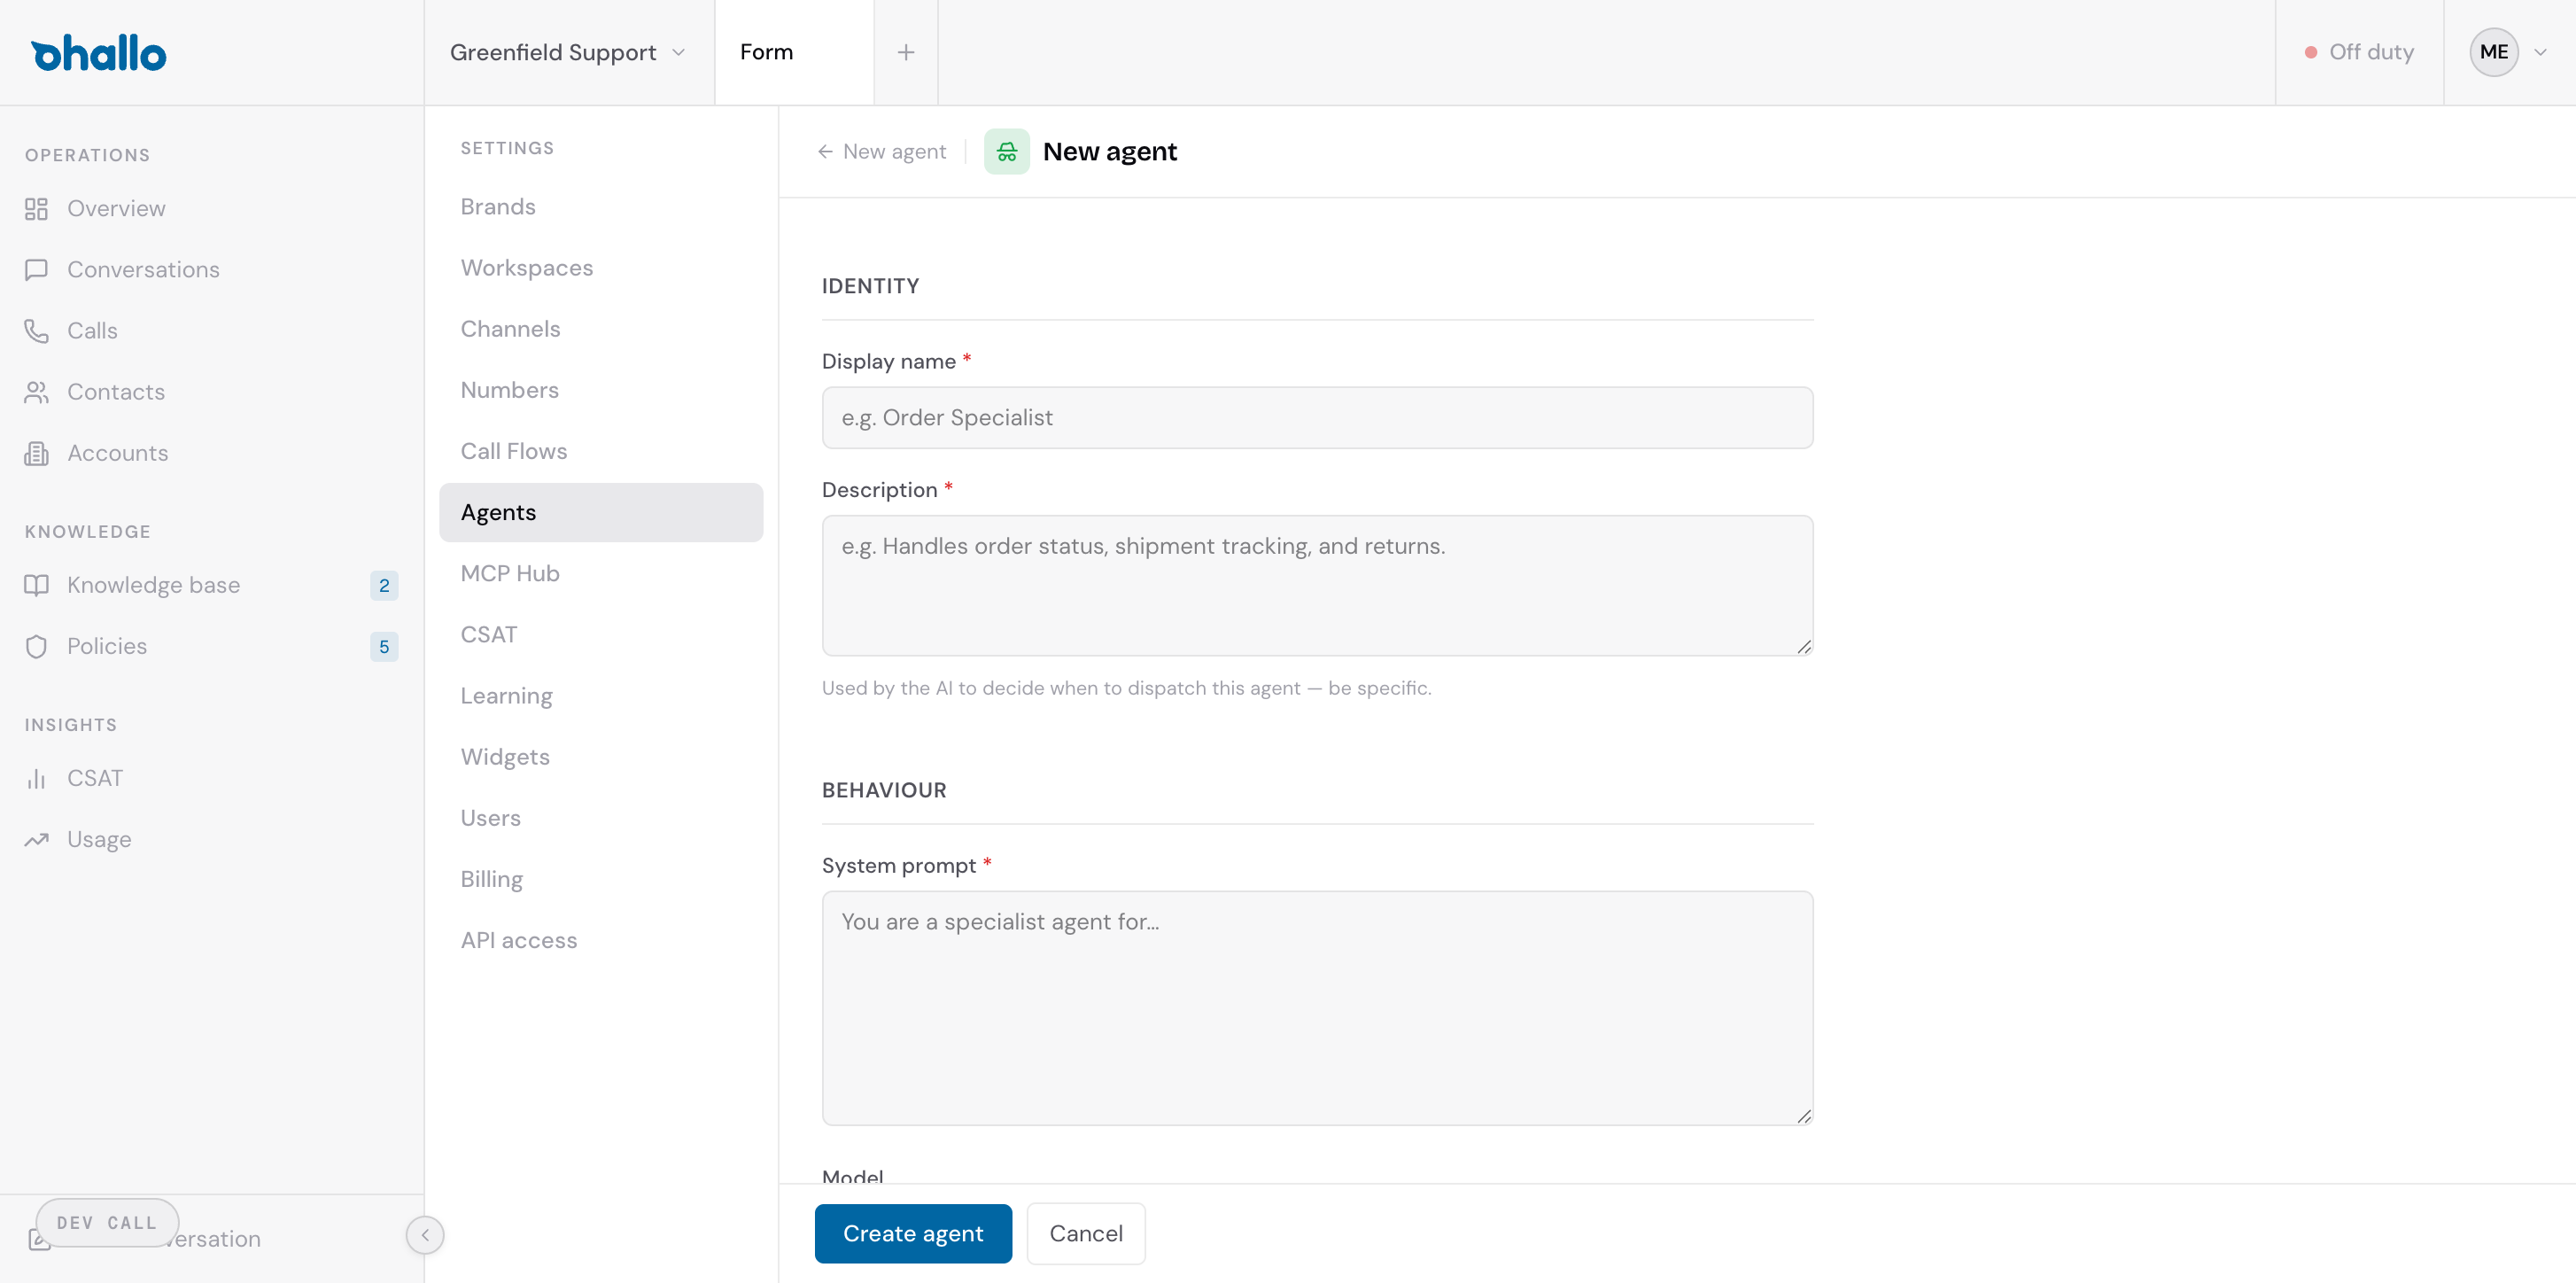
The form has three sections:
Identity
Section titled “Identity”| Field | Required | Description |
|---|---|---|
| Display name | Yes | A clear name describing what the agent does (e.g. “Order Status Agent”). This appears in the agents list and in conversation logs. |
| Description | Yes | Explains when this agent should be invoked. The Orchestrator reads this description to decide whether to call your agent for a given customer message. Be specific — a vague description means the agent will be called too often or not enough. |
Example description: “Handles customer inquiries about order status, shipment tracking, delivery estimates, and order modifications. Should be invoked when the customer references an order number or asks about a delivery.”
Behaviour
Section titled “Behaviour”| Field | Required | Description |
|---|---|---|
| System prompt | Yes | Detailed instructions for the agent. This is the most important field — it tells the agent exactly what to do, what data to look up, and how to handle different scenarios. |
| Model | No | The AI model the agent uses. Defaults to the recommended model. Only change this if you have a specific reason. |
Example system prompt for an Order Status Agent:
You are a specialist agent for order status inquiries. When invoked:
- Extract the order number from the customer’s message or conversation history
- Call search_orders to find the order
- If the order is found, return the current status, shipping carrier, tracking number, and estimated delivery date
- If the order is not found, say so clearly and ask the customer to verify the order number
- Never guess or fabricate order details — only report what the system returns
This section lets you assign MCP tools to the agent. Expand each MCP connection to see its available tools, then tick the ones this agent should have access to.
- At least one tool must be selected
- Only give each agent the tools it actually needs — this keeps it focused and prevents unintended actions
- For example, an Order Status Agent might only need “search_orders” and “get_order” from the Order Management connection, not “create_order” or “cancel_order”
If no MCP connections are configured yet, a message will prompt you to set them up in the MCP Hub first.
Step 3 — Save the agent
Section titled “Step 3 — Save the agent”Click Create agent at the bottom. The agent is immediately active — the Orchestrator will start considering it for incoming messages.
Editing an existing agent
Section titled “Editing an existing agent”Click on any agent in the list to open its detail page. From there you can:
- Update the display name, description, or system prompt
- Change the model
- Add or remove tool access
- Delete the agent (custom agents only)
Changes take effect immediately on the next conversation.
Tips for effective agents
Section titled “Tips for effective agents”- Write clear descriptions — the Orchestrator uses the description to decide when to invoke your agent. Be specific about the situations where it should be called. A description like “Handles orders” is too vague; “Resolves order status inquiries, shipment tracking, and delivery estimate questions when the customer references an order number” is much better.
- Be specific in system prompts — tell the agent exactly what steps to follow, what data to retrieve, and how to handle edge cases. Number the steps so the agent follows them in order.
- Tell the agent what not to do — include explicit constraints like “never estimate delivery dates — only report what the tracking system returns” or “do not offer refunds without first checking the return policy.”
- Limit tool access — only give each agent the tools it actually needs. An agent with access to “cancel_order” when it only needs “get_order” could take unintended actions.
- Start simple — create one agent per task. It is better to have several focused agents than one agent that tries to do everything. You can always combine responsibilities later.
- Test with real scenarios — after creating an agent, send test messages that match its description and verify the responses are accurate.